Excel: Comments and Co-authoring

Lesson 25: Comments and Co-authoring

/en/excel/conditional-formatting/content/

Introduction

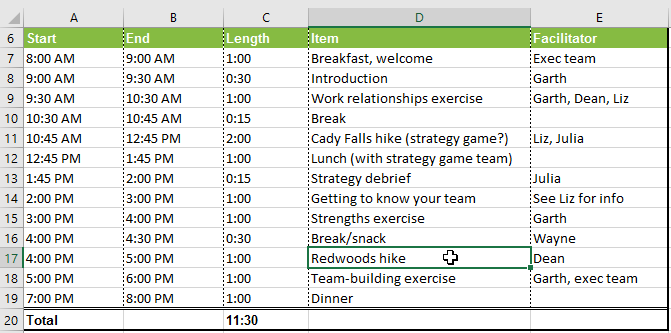
There may be times when you're working on a workbook and find that you need the help of others. Excel offers two powerful features that allow you to work with others on the same spreadsheet: comments and co-authoring.

Optional: Download our practice workbook.

Watch the video below to learn more about comments and co-authoring.

The Track Changes feature can also be helpful to review changes before making them permanent. It's still available in Office 365, but it's now hidden by default. You can learn more about Track Changes in our Excel 2016 lesson here.

Sharing a workbook with others

In order for others to collaborate on a workbook, you'll need to share it with them first. 

  1. Click the Share button in the top-right corner.
    screenshot of the Share button in Microsoft Excel
  2. Click the OneDrive option associated with your account in order to upload the workbook.
    screenshot of selecting the OneDrive option in the Share menu
  3. The Share pane will appear on the right side of the screen. Type the email address of the person you'd like to share the workbook with.
    screenshot of entering an email address in the Share pane
  4. Select Can edit from the drop-down menu to allow this person to edit the workbook.
    screenshot of selecting "Can edit" from the drop-down menu in the Share menu
  5. Type a message if you want to include one, then click Share.
    screenshot of clicking the Share button after typing a message
  6. Your collaborators will now be able to access the workbook.

Comments

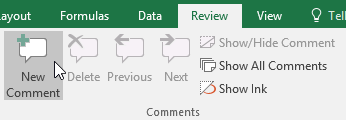
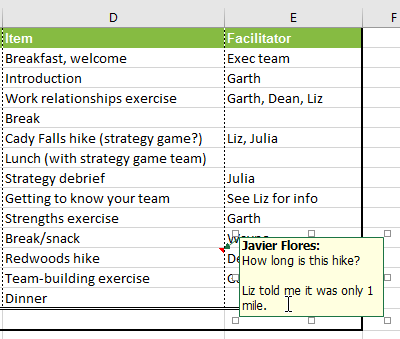
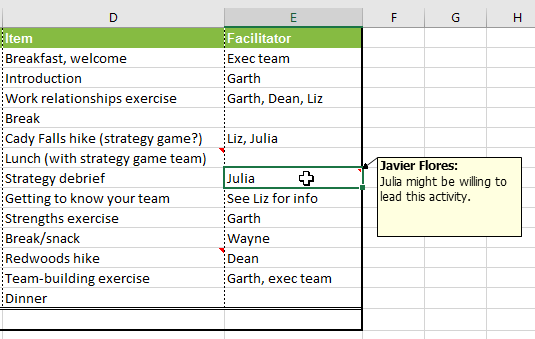
One way to collaborate on a workbook is through commenting. Sometimes you may want to provide feedback or ask a question without editing the contents of a cell. You can do this by adding a comment.

To add a comment:

  1. Select the cell where you want the comment to appear. In our example, we'll select cell D17.
    Selecting cell E8
  2. From the Review tab, click the New Comment command.
    Clicking the New Comment command
  3. A comment box will appear. Type your comment, then click anywhere outside the box to close the comment.
    Adding a comment
  4. The comment will be added to the cell, represented by a red triangle in the top-right corner.
    Comment indicator
  5. Select the cell again to view the comment.
    Selecting a cell to view a comment

To edit a comment:

  1. Select the cell containing the comment you want to edit.
  2. From the Review tab, click the Edit Comment command.
    Clicking the Edit Comment command
  3. The comment box will appear. Edit the comment as desired, then click anywhere outside the box to close the comment.
    Editing a comment

To show or hide comments:

  1. From the Review tab, click the Show All Comments command to view every comment in your worksheet at the same time.
    Clicking the Show All Comments command
  2. All comments in the worksheet will appear. Click the Show All Comments command again to hide them.
    Viewing all comments at the same time

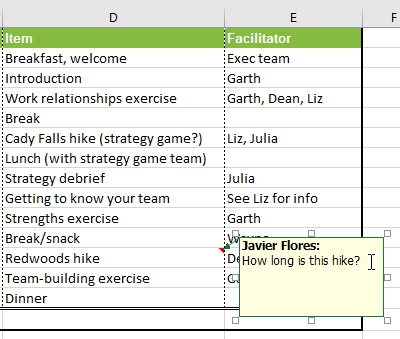
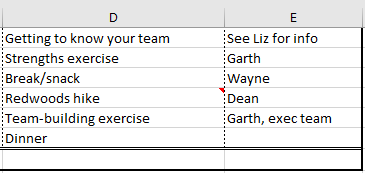
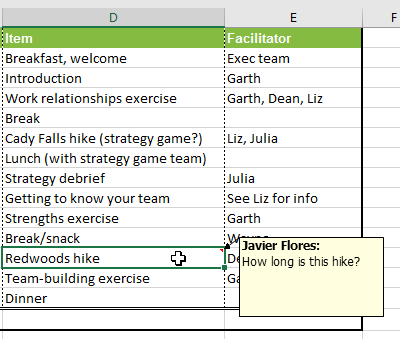
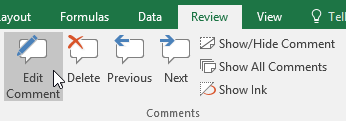
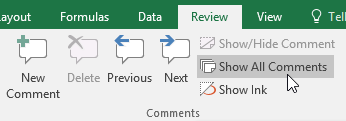
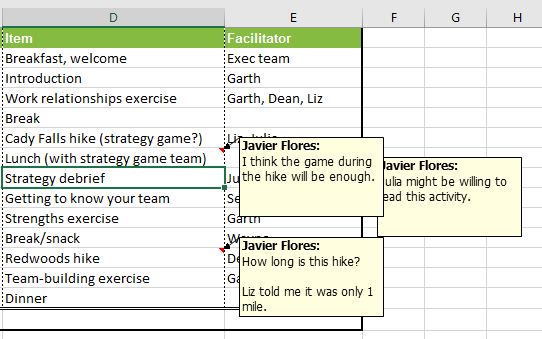
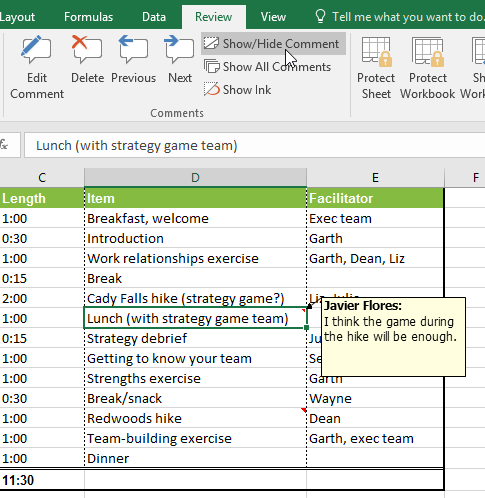
You can also choose to show and hide individual comments by selecting the desired cell and clicking the Show/Hide Comment command.

Showing and hiding individual comments

To delete a comment:

  1. Select the cell containing the comment you want to delete. In our example, we'll select cell E13.
    Selecting cell E8
  2. From the Review tab, click the Delete command in the Comments group.
    Clicking the Delete command
  3. The comment will be deleted.
    After deleting the comment

Co-authoring

Another collaboration tool is co-authoring, which allows others to view and edit your workbook in real time. This makes it easier and quicker to collaborate on a workbook with your team. After sharing a workbook with others, they'll be able to co-author it.

Real-time co-authoring requires an Office 365 subscription.

When you co-author a workbook, you can see others at work because each will have their own unique color. If you want to see who's currently editing a workbook, you can hover over the activity to see their name.

screenshot of hovering over a colored selection to see who is currently co-authoring a workbook

Restoring a previous version

When you or anyone else makes changes to a workbook, the changes are saved automatically. However, if you're unhappy with the changes, you can always restore a previous version.

  1. Click the clock icon next to the Share button.
    screenshot of clicking the clock icon to access the Version History menu
  2. A Version History pane will appear on the right side of the screen. Double-click the version you'd like to restore.
    screenshot of selecting a previous version to restore
  3. Once you've decided this is the version you want, click Restore.
    screenshot of clicking the Restore button to restore a previous version
  4. The previous version will be restored.

Challenge!

  1. Open our practice workbook.
  2. Add four comments to the worksheet.
  3. Delete one of the comments.
  4. Make all of the comments visible, using Show All Comments.
  5. When you're finished, your workbook should look something like this:
    screenshot of a worksheet with some comments added
  6. Optional: Share the document with someone you know, and experiment with some of the various co-authoring features.

/en/excel/inspecting-and-protecting-workbooks/content/