PowerPoint 2013: Managing Slides

Lesson 11: Managing Slides

/en/powerpoint2013/applying-transitions/content/

Introduction

As you add more slides to a presentation, it can be difficult to keep everything organized. Fortunately, PowerPoint offers tools to help you organize and prepare your slide show.


Optional: Download our practice presentation.

About slide views

PowerPoint includes several different slide views, which are all useful for various tasks. The slide view commands are located in the bottom-right of the PowerPoint window. There are four main slide views:

Screenshot of PowerPoint 2013
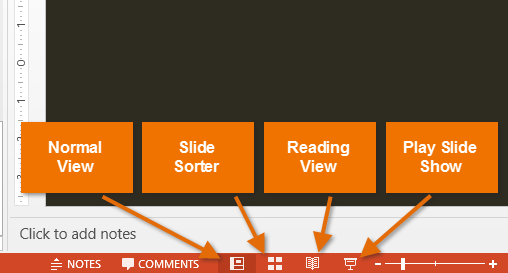
The different slide view commands
  • Normal view: This is the default view, where you create and edit slides. You can also move slides in the slide navigation pane on the left.
    Screenshot of PowerPoint 2013Normal View
  • Slide sorter: In this view, you'll see a thumbnail version of each slide. You can drag and drop slides to reorder them quickly.
    Screenshot of PowerPoint 2013Slide Sorter
  • Reading view: This view fills the PowerPoint window with a preview of your presentation. It includes easily accessible navigation buttons at the bottom-right.
    Screenshot of PowerPoint 2013Reading View
  • Play slide show: This is the view you'll use to present to an audience. This command will begin the presentation from the current slide. You can also press F5 on your keyboard to start from the beginning. A menu will appear when you hover the mouse in the bottom-left corner. These commands allow you to navigate through the slides and access other features, such as the pen and highlighter.
    Screenshot of PowerPoint 2013Playing a slide show

Outline view

Outline view shows your slide text in outline form. This allows you to quickly edit your slide text and view the content of multiple slides at once. You could use this layout to review the organization of your slide show and prepare to deliver your presentation.

To view an outline:

  1. From the View tab, click the Outline View command.
    Screenshot of PowerPoint 2013Clicking the Outline View command
  2. An outline of your slide text will appear in the slide navigation pane.
  3. You can type directly in the outline to make changes to your slide text.
    Screenshot of PowerPoint 2013Editing an outline

Slide notes

You can add notes to your slides from the Notes pane. Often called speaker notes, they can help you deliver or prepare for your presentation.

To add notes:

  1. Click the Notes command at the bottom of the screen to open the Notes pane.
    Screenshot of PowerPoint 2013Clicking the Notes command
  2. Click and drag the edge of the pane to resize it if desired.
    Screenshot of PowerPoint 2013Resizing the Notes pane
  3. Click the Notes pane, and begin typing to add notes.
    Screenshot of PowerPoint 2013Adding notes

You can also access Notes Page view to edit and review your notes. Just click the Notes Page command from the View tab. From there, you can type notes in the text box below each slide.

Screenshot of PowerPoint 2013Notes Page view

Slide sections

If you have a lot of slides, you can organize them into sections to make your presentation easier to navigate. Sections can be collapsed or expanded in the slide navigation pane and named for easy reference.

To create slide sections:

In our example, we will add two sections: one for dogs that are available for adoption, and another for cats and other pets.

  1. Select the slide you want to begin a section.
    Screenshot of PowerPoint 2013Selecting a slide to begin a section
  2. From the Home tab, click the Section command, then choose Add Section from the drop-down menu.
    Screenshot of PowerPoint 2013
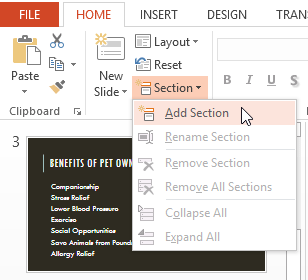
Clicking Add Section
  3. An Untitled Section will appear in the slide navigation pane.
    Screenshot of PowerPoint 2013A newly created section
  4. To rename the section, click the Section command, then choose Rename Section from the drop-down menu.
    Screenshot of PowerPoint 2013
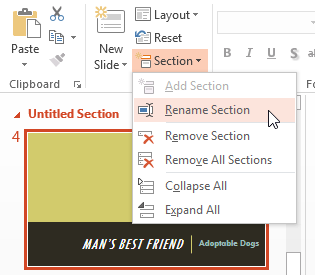
Clicking Rename Section
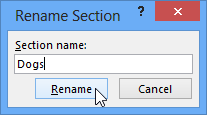
  5. Type the new section name in the dialog box, then click Rename.
    Screenshot of PowerPoint 2013Renaming a section
  6. Repeat to add as many sections as you need.
  7. In the slide navigation pane, click the arrow next to a section name to collapse or expand it.
    Screenshot of PowerPoint 2013
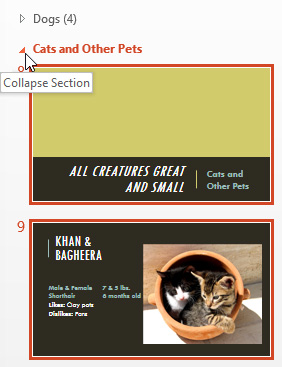
Collapsing a section

To remove a section, click the Section command, then click Remove Section. You can also click Remove All Sections to remove all sections from your slides.
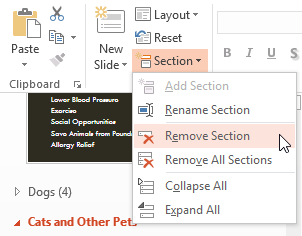
Screenshot of PowerPoint 2013Removing a section

Challenge!

  1. Open an existing PowerPoint presentation. If you want, you can use our practice presentation.
  2. Try switching between various slide views.
  3. View an outline of your presentation.
  4. Try adding speaker notes to your presentation using the Notes pane and the Notes Page view.
  5. Divide your presentation into at least two sections, then try collapsing and expanding them. If you are using the example, create one section for Dogs and another for Cats and Other Pets.

/en/powerpoint2013/printing/content/