Lesson 16: Using the Page Setup Dialog Box
/en/word2000/using-the-ruler/content/
Introduction
By the end of this lesson, you should be able to:
- Use the Page Setup dialog box
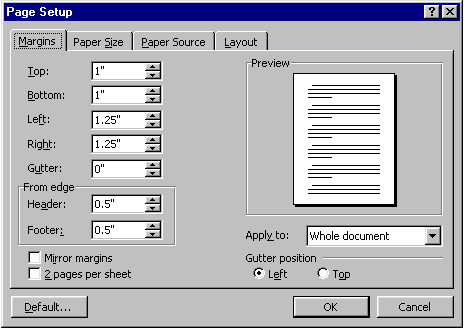
Using Page Setup to set margins
The Page Setup dialog box allows you to change the margins of your document.
To set margins:
- Choose File
 Page setup.
 - Click the Margins tab in the Page Setup dialog box.
- Change the margins of your document by entering a new number in the box next to the margin you want to change.
- Click OK.
OR - Change the margin in precise steps by clicking the up or down arrows next to the margin you want to change.
- Click OK.

Other tips for setting up margins
- Click the default button in the lower-left corner to set (or reset) Word's default margins.
- You can choose to apply these new margins to the entire document or from this point forward.
- Gutter position: In a document with two-sided pages, the term gutter refers to a margin setting that adds extra space to the side or top margin of a document you plan to bind. A gutter margin ensures the binding doesn't hide text. The default gutter position is left. You shouldn't need to change the gutter default. In left-to-right documents, the gutters of odd-numbered pages are always on the left, and the gutters of even-numbered pages are always on the right.
- Mirror margins: Mirror margins are used when printing bound documents.
- To change the mirror margins for part of a document:
- Select the text.
- In the Apply to: box, click Selected text.
- Word automatically inserts section breaks before and after the text with the new margin settings.
- If your document is already divided into sections, you can click a section or select multiple sections, then change the margins.
Using Page Setup to set page orientation
The default page orientation is portrait (8.5x11).
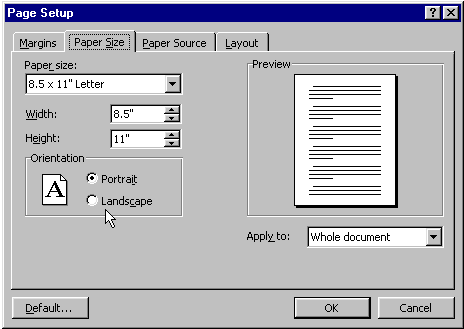
If your document would display better in landscape orientation (11x8.5), you can change the orientation using the Page Setup dialog box.
To change page orientation:
- Choose File
 Page Setup.
 - Click the Paper Size tab.
- In the Orientation area, click the Portrait or Landscape radio button.
- The Preview area shows how your document looks.
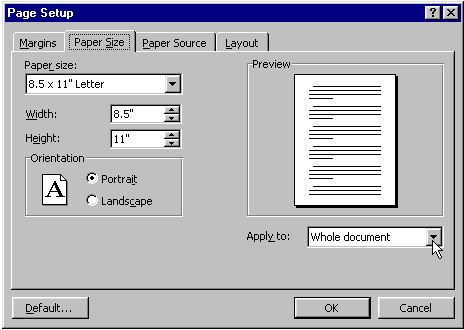
- Pay close attention to the Apply To: area.

Using Page Setup to set paper size
The default paper size is 8.5x11, but you can change the paper size. You can even customize the paper size to include note cards and other sizes.
To change paper size:
- Choose File
 Page Setup.
 - Click the Paper Size tab.
- In the Paper size area, adjust paper size using the drop-down menu or the width and height scroll boxes.
- The Preview area shows how your document looks.
- Pay attention to the Apply To: area.
- Click OK.

Did you know?
To create a title page for your document:
- Enter the text you want on your title page.
- Choose File
 Page Setup.
 - Click the Layout tab.
- Under Vertical Alignment, you will find the following options:
Top: Default; text lines up with top margin
Center: Text on page is centered between the top and bottom margins
Justified: Text is spread out so each line is the same distance apart
Bottom: Text lines up with the bottom page
/en/word2000/bold-italics-underline-and-format-painter/content/


 Page setup.

