Word 2003 -
Formatting Text

Word 2003
Formatting Text


/en/word2003/using-the-ruler/content/
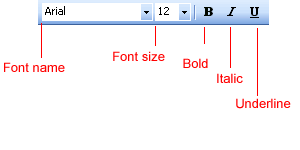
The Formatting toolbar contains buttons that allow you to change the appearance of your text. The Formatting toolbar contains buttons for font size, font style, font colors, and other options. There are many different types of fonts. Some are better used for business correspondence, while others are great for fun projects like birthday cards. Your computer probably has 20 or more different fonts installed.
Any text you type in Word can be further customized by using the bold, italicized, or underlined options. You can even do a combination of all three options.

To avoid frustration, remember to select text before you apply style. If you choose a type style without selecting any text, Word uses your chosen styles on whatever text you type next.
To select a font, you can scroll through the font list. The list shows you all fonts that are available on the computer you are using.
As you scroll through the many different font names, take notice of those fonts that have TT beside their name. These TrueType fonts will look the same on both the computer screen and when you print them on paper.
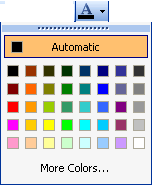
The use of color can add emphasis to your words and make your document easier to read.
If you own a color printer, you can print documents in different colors. If you do not own a color printer, your document will only appear in color on the screen.

If you would like to see more color options, Click the More Colors button at the bottom of the color palette. You can choose from a list of Standard Colors or Customize your own color by clicking the Customize tab.
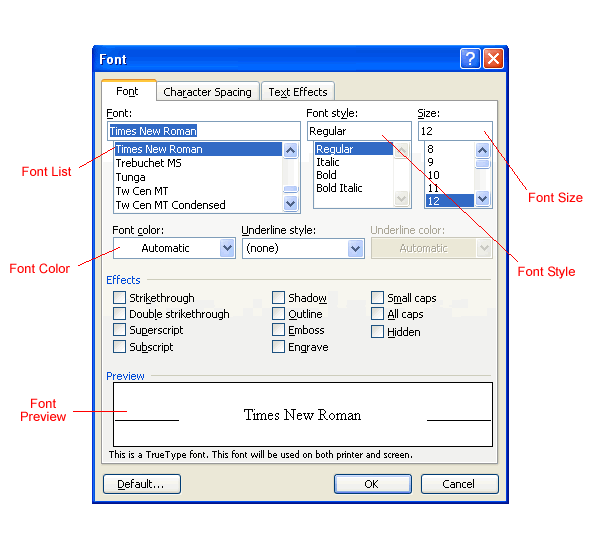
The Font dialog box gives similar options as the Formatting toolbar; however, it also offers more advanced text features. You can use the Font dialog box to change your font, font style, size, color, and many other font effects.

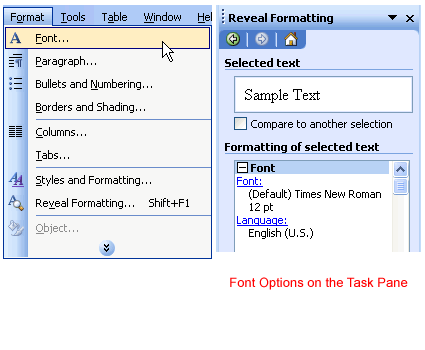
 Remember, you can also access the Font dialog box from the Font menu on the task pane.

You can change the font size from both the Font dialog box and the Formatting toolbar. You can use different font sizes to give emphasis to different parts of your document. For example, the title of your document could be displayed larger than the contents of your paper. Font size is commonly expressed in points. Font sizes range from 8 point (extremely small) to 72 point (extremely large). Word allows you to choose sizes smaller than 8 point and larger than 72 point, but you must type these in manually in the Font Size box.
Arial 10 Point
Arial 12 Point
Arial 20 Point
Arial 30 Point
The standard font size for most documents is 12 point. You can preview different font sizes in the Preview window in the Font dialog box.
OR
 Remember, you can also change the font size from the Formatting toolbar.
Word offers a variety of templates that provide you with a preformatted document. Instead of having to create formats yourself, you can quickly choose among a variety of templates.
Download and save the Cover Letter Word document to complete the challenges below.
/en/word2003/bulleted-and-numbered-lists/content/