Basic CSS -
Adding CSS to a Webpage

Basic CSS
Adding CSS to a Webpage


/en/basic-css/about-css/content/
Once you have a basic grasp of what CSS actually is, you need to be able to see it work. A great way to do that is to write and run your own CSS on your computer. This lesson assumes that you:
If you haven’t completed the Basic HTML tutorial, but you’re already comfortable with HTML, you can download the finished do-it-yourself project and be up to speed for this tutorial. All you need to do after downloading is unzip the file and move the GCF Programming Tutorials folder you find inside to somewhere you'll remember.
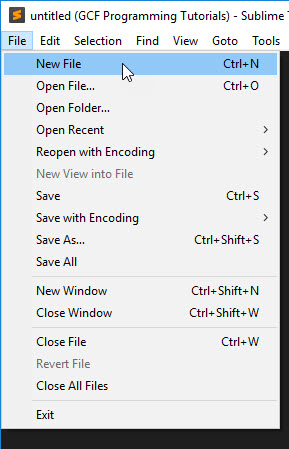
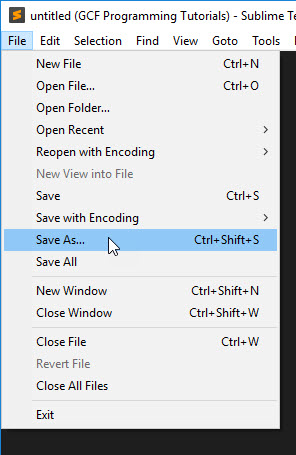
Follow these steps to create your first CSS stylesheet.


You have now created an empty CSS stylesheet. Like the index.html file in your project, there isn’t anything fundamentally different about this file and a text file; the file extension is the only real distinction.
Also, just as index.html was a popular naming convention for the home page of a website, styles.css is a popular naming convention for the main stylesheet of a webpage. You could call it anything you wanted, but styles.css is a common choice.
Now that you have your empty styles.css stylesheet open in your text editor, you can write your first CSS. Type or copy the following into your empty stylesheet and save it:
p {
  color: red;
}
This ruleset targets every <p> element on the page. We’ll talk about the color declaration more later on, but for now, all you need to know is that it’ll make your paragraph text red. However, before it can actually do that, your HTML document needs to know about your new stylesheet.
Before your HTML and CSS can work together, the two files—index.html and styles.css—need to be connected to each other. Follow these steps to attach your CSS stylesheet to your HTML document:
<head> element. There should be nothing in there except for a <title> element right now.
<head> element, add this new element: <link rel="stylesheet" href="styles.css">
Like the other elements that go in the <head> element, the <link> element will not actually appear on the page. Instead, it defines a connection between two separate files using two HTML attributes:
<a> element, the <link> element also includes an href (hypertext reference) that points to the file you want to link. Because your files are all in the same folder, you can just use the name of the file to point to it. However, you could also use a full file path (C:\Users\You\styles.css) or a web address (https://yoursite.com/styles.css) if you had your styles.css file stored elsewhere.
Once you’ve added the <link> element inside the <head> element, save your index.html file and you can view your changes in your browser. Just follow these steps:
The file should open in your default web browser, but with red paragraph text. We'll change that back eventually, but for now, it should help us confirm that everything is working. First it looked like this, and now it should look more like this.
Congratulations, you just added CSS to your webpage!
/en/basic-css/css-selectors/content/