Basic HTML -
Create A Webpage

Basic HTML
Create A Webpage


/en/basic-html/about-html/content/
This lesson is part of a series on computer programming. You can go to Intro to Programming if you'd like to start at the beginning.
Once you have a basic grasp on what HTML actually is, you need to be able to see it work. A great way to do that is to write and run your own HTML on your computer. This lesson assumes that you've set up your workspace and are comfortable with the general skills that all of these tutorials require, so be sure to read lessons if not.
Keep in mind that the HTML document you'll be creating in this lesson will only be available on your computer; it will not be accessible by anybody else online. However, you will still be able to load it in your browser just like the webpages you regularly visit.
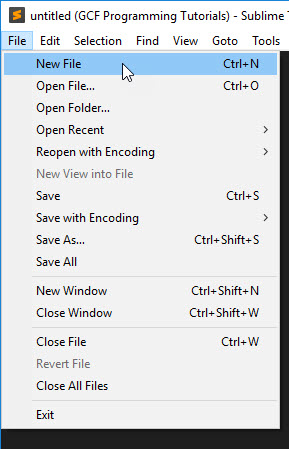
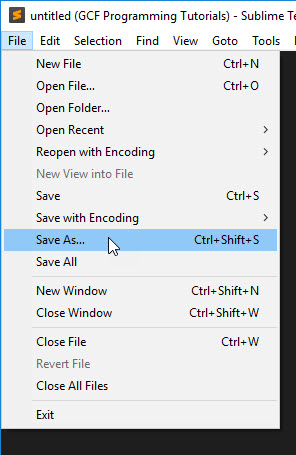
Follow these steps to create your first HTML file.


You have now created an empty HTML file where you'll write your first code in the following steps. There isn't anything fundamentally different about the file you just created and a text file, for example, which you could have named index.txt. The difference is that the file extension (.html, as opposed to .txt) will let any program trying to open the file know what kinds of contents it will find inside.

The name you gave it, index.html, is a common name for the home page of a website. You could name it mywebsite.html, or xxlovin2codexx.html, or whatever you want, and it will work the same. The filename index.html is just a convention that has become popular over time and lets any other programmer (or even you, if you forget) know which file is the main file of your website.
Now that you have your empty index.html file open in your text editor, you can write your first HTML. Type or copy the following into your empty index.html file:
<html>
  <body>
    <p>Hello, world!</p>
  </body>
</html>
There are a few basic pieces to look at here:
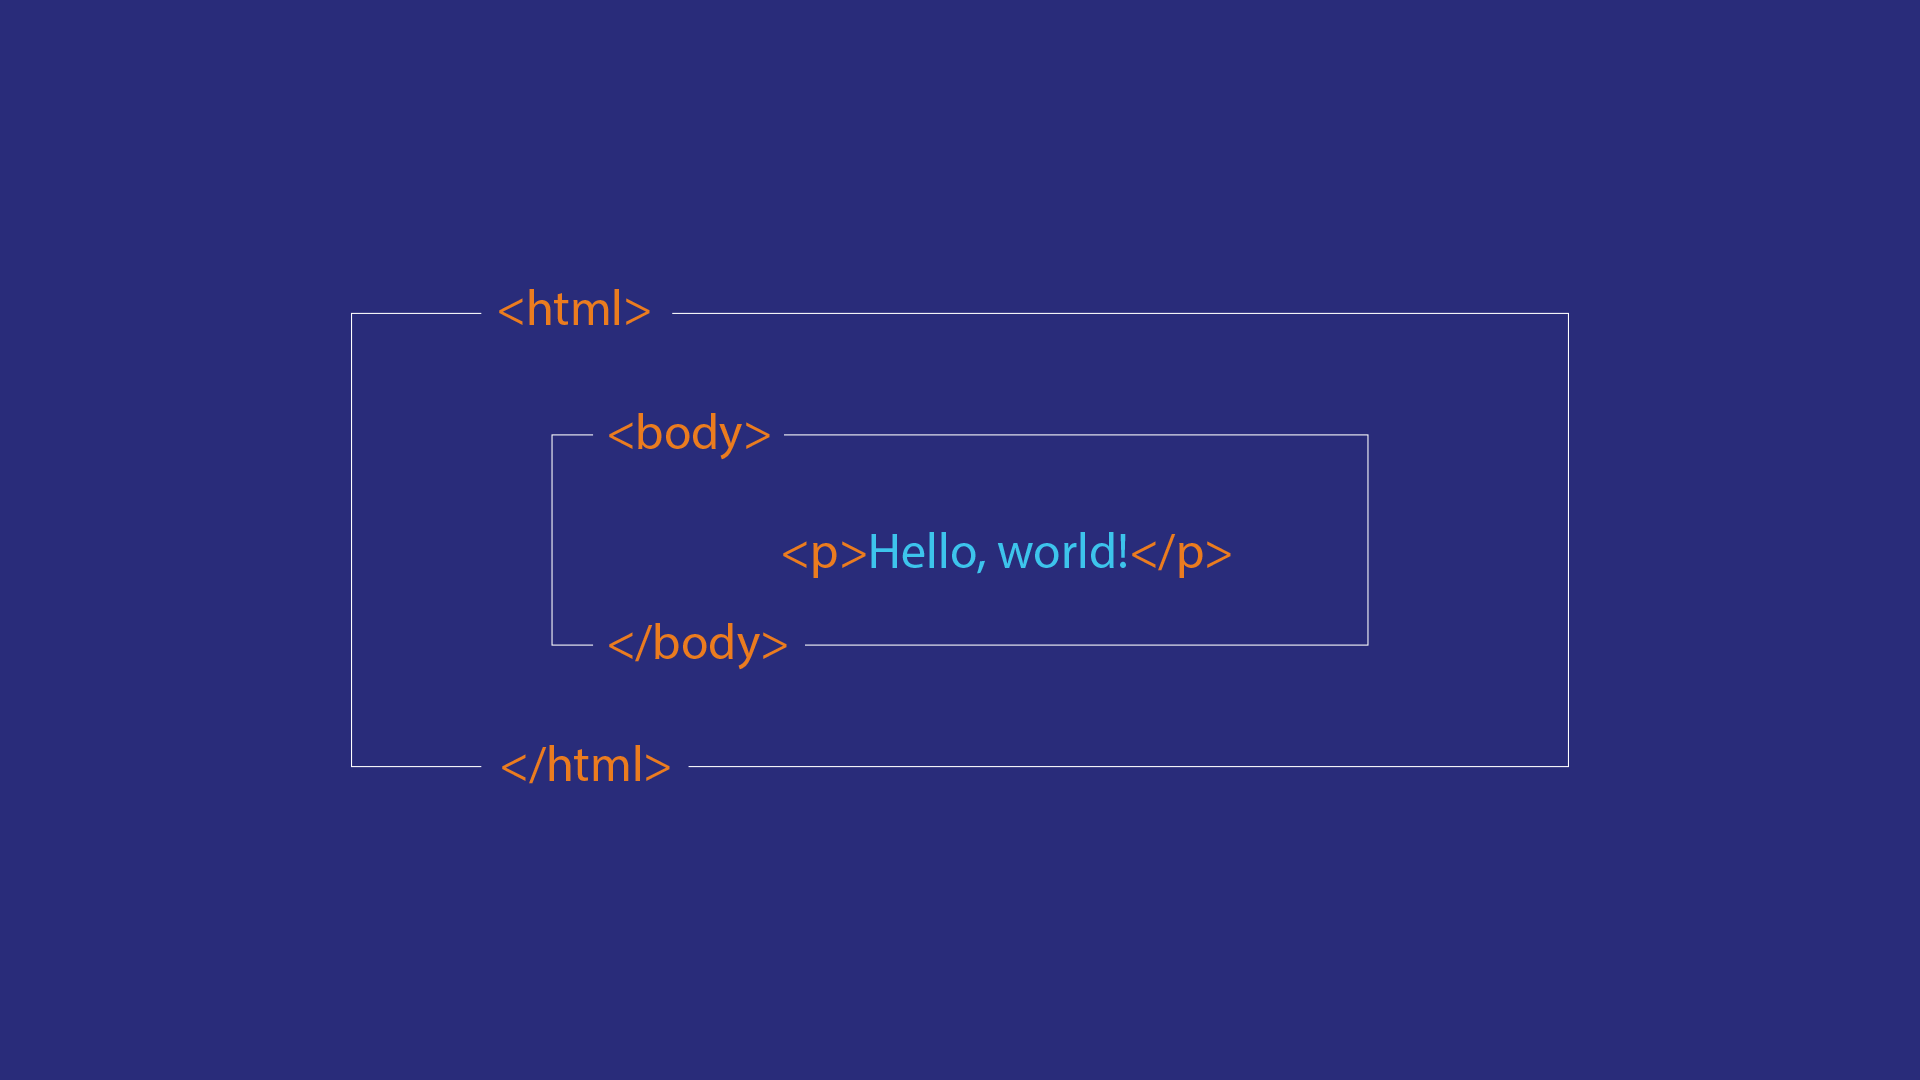
<html>: The html element is the base container for everything else on your webpage. Every other element you add will go inside of this one.<body>: The body element is where you will put all of the actual content of your website. If you were to leave it blank, you could still load the page, but you'd see nothing but a white screen. To start, all we'll put inside is a paragraph element, which you saw in the last lesson.<p>: The paragraph element is just like the paragraph elements you've seen before. This one is just nested inside other elements.Only the <p> element will actually show up as something you can see on the page. The others are what is often referred to as boilerplate code, meaning that they appear unchanged in just about every HTML document because your browser requires them.
There are other pieces of boilerplate code that your browser requires before it will consider this a valid webpage, but we'll get to those later.
Nesting
You might have noticed a few things about how that code was formatted, too. For example, some of the elements are inside other elements. This is another example of the concept of nested elements that we covered before.
Remember that you can think of most HTML elements as containers. For example, in the code above:
<html> and </html> tags contain the <body> element<body> and </body> tags contain the <p> element<p> and </p> tags contain some text
Indentations
There are also indentations before some of the tags. They're there to make the code more readable to the programmer working on it. Some people prefer to use the tab key to make these indentations, while others prefer a few presses of the space bar, but in either case, the goal is to have an increasing amount of space for each layer of nested elements, which makes it clearer which elements are inside of which.
As far as your browser goes, the amount you indent each element makes no difference. Your browser could read that code formatted this way just as easily:
<html><body><p>Hello, world!</p></body></html>
That kind of formatting would make things much more difficult for you, though, and would make it much easier to make a mistake if you wanted to change something.
Once you've filled in your HTML file and saved it, you can view it as a webpage in your browser. Just follow these steps:
The file should open in your default web browser. You should see something like this:

Congratulations! You just created your first webpage!
If you want to keep playing with these basic pieces, you can.
/en/basic-html/text-elements-in-html/content/